Microsoft Entra ID OIDC Configuration
Pro only
Configuration in Microsoft Entra ID
- Open Microsoft Entra Admin Center
- Select Applications -> App registrations -> New registration
-
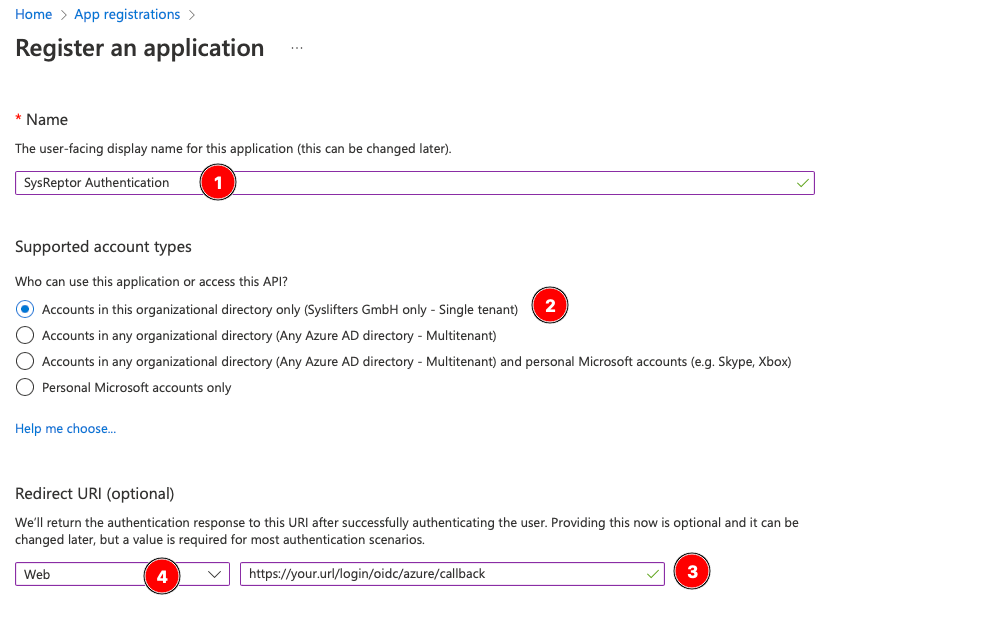
In following menu:
- Enter a Name for your reference (1)
- Select the types of accounts who are allowed to login (2) - this is the first option "Single tenant" in most cases
- Enter the redirect url of your application in the following format: https://your.url/login/oidc/entra/callback (3)
- Select type "Web" for redirect url (4)
-
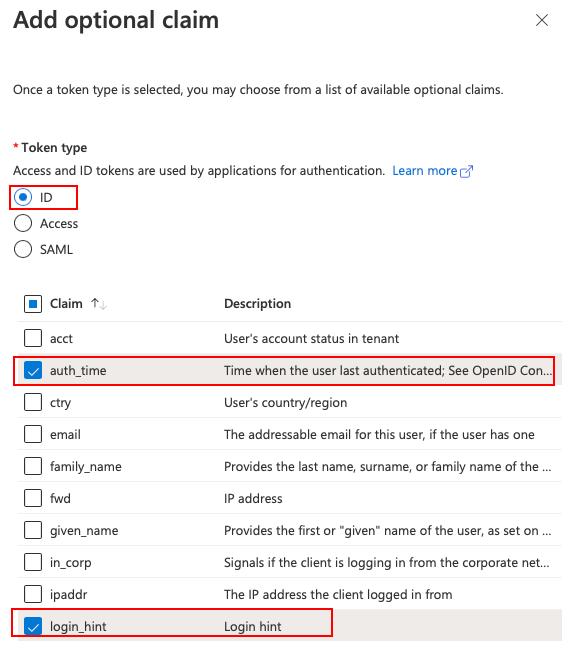
In the newly created "App registration", go to the Token configuration submenu and add the following optional claim:
- TokenType: ID
- Claims: auth_time, login_hint
-
Next go to the "Certificates & Secrets" submenu and add a new client secret with 24 months validity (this is the maximum) and any description.
- Copy the value of the newly created secret and store it for later use.
- Finally go to the "Overview" submenu and copy the values Application (client) ID and Directory (tenant) ID.
You should now have the following values:
- Client ID
- Client secret
- Entra tenant ID
SysReptor Configuration
Create your OIDC configuration for SysReptor...
1 2 3 4 5 6 7 8 9 10 11 12 13 14 15 | |
...and add it to your application settings (OIDC_AUTHLIB_OAUTH_CLIENTS).
The OIDC client needs to be able to establish a network connection to Microsoft Entra ID. Make sure to not block outgoing traffic.
Other JSON fields, user_identifier_claim, and general SSO limitations are covered in Generic OIDC configuration and Limitations.
Entra ID: email_verified
Some Entra ID configurations omit email_verified or return email_verified=false. See Verified Emails and adjust require_email_verified only if you understand the trade-off.
Edit / View on GitHub