Microsoft ADFS OIDC Configuration
Pro onlyConfiguration in Microsoft ADFS
Open the ADFS Management tool.
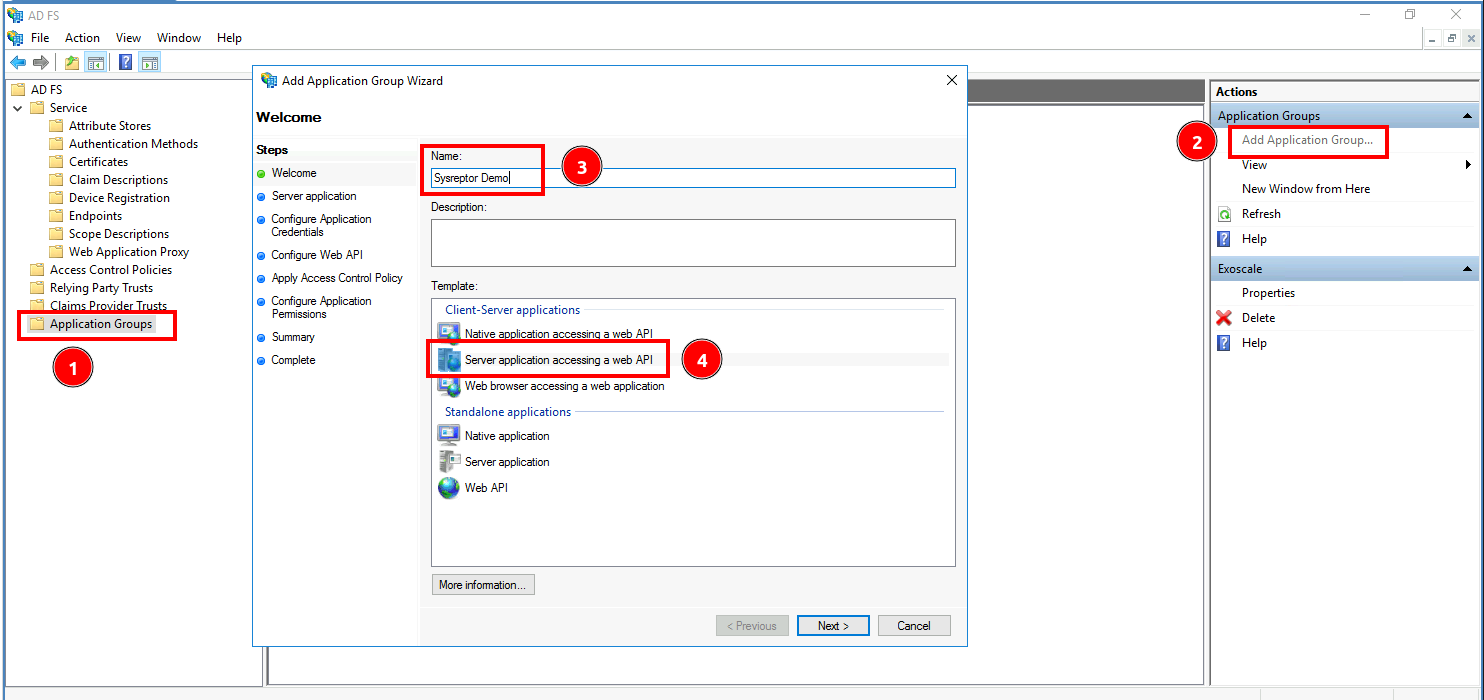
Register an application group:
- Go to "Application Groups" (1)
- Add a new Application Group (2)
- Enter an Application Group Name (3)
- Select the Template "Server application accessing a web API" (4)
- Click "Next"
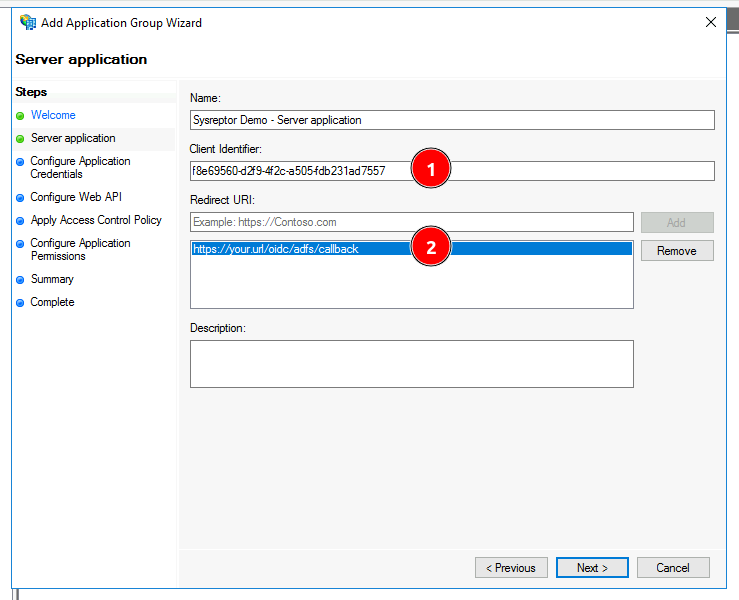
Register a server application:
- Copy the client identifier for later (1)
- Enter the redirect url of your application in the following format: https://your.url/login/oidc/adfs/callback (2)
- Click "Next"
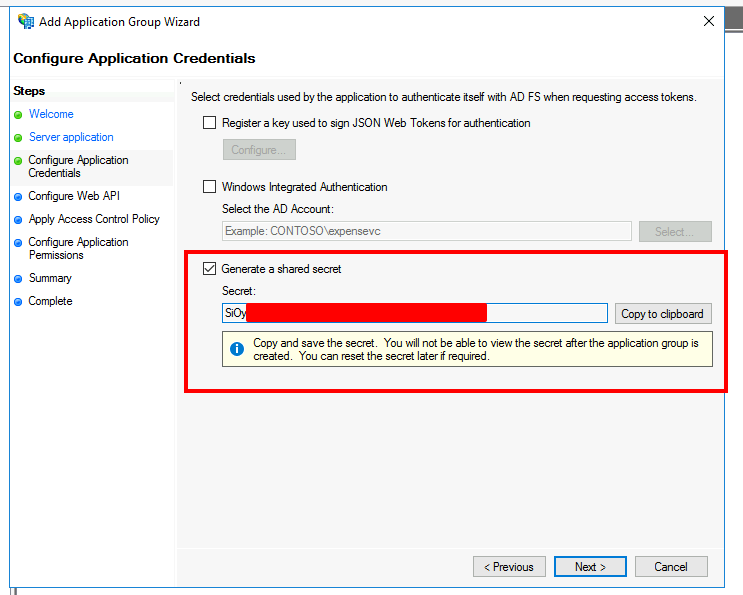
Configure Application credentials:
- Select "Generate a shared secret"
- As mentioned, copy and save the secret for later.
- Click "Next"
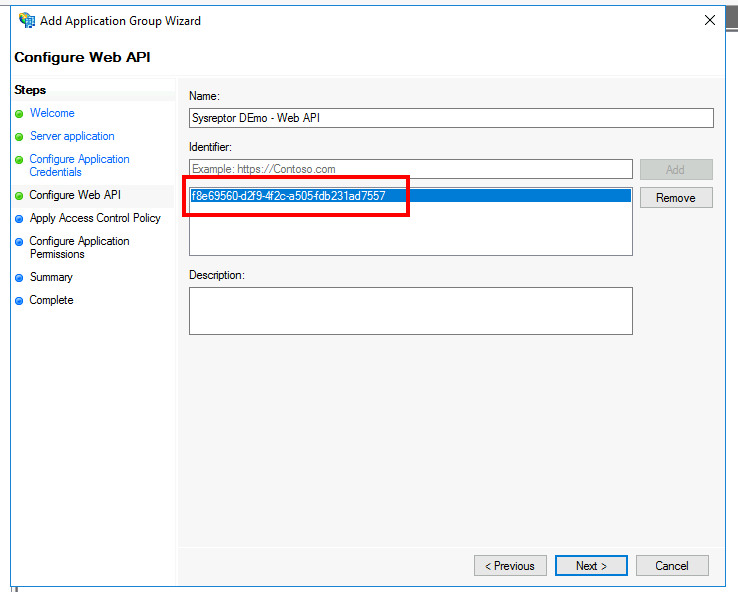
Configure Web API:
- Copy the client identifier from the point 3. in the
Identifierfield. - Click "Next"
- Copy the client identifier from the point 3. in the
Configure Access Control Policy:
- Here we will allow a specific group only and require MFA for users (1)
- Click the
parameterlink in thePolicyfield (2) - Add the AD Group you want to add (3 and 4)
- Click "OK" and "Next"

Configure Application Permissions:
- In the permitted scope check
allatclaims,email,openidandprofile. - Click "Next"
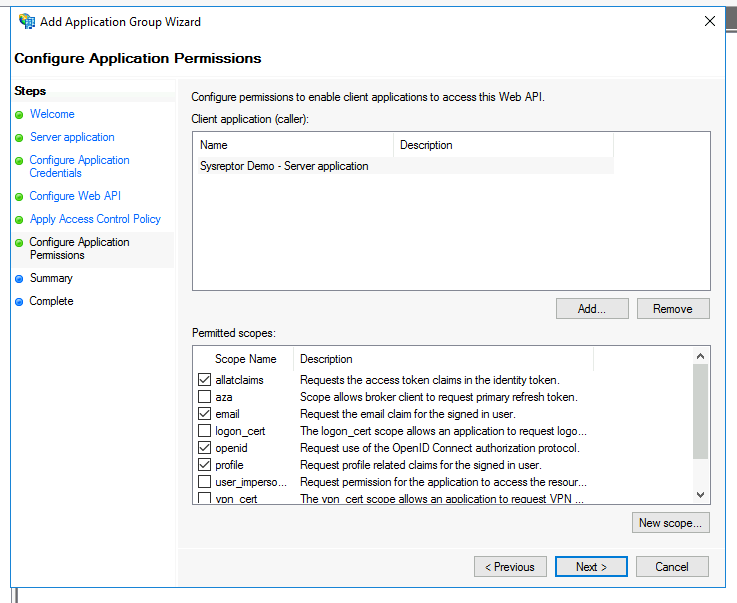
- In the permitted scope check
Configure Claim Rules:
- After creating your application group successfully, right click on your application and click on
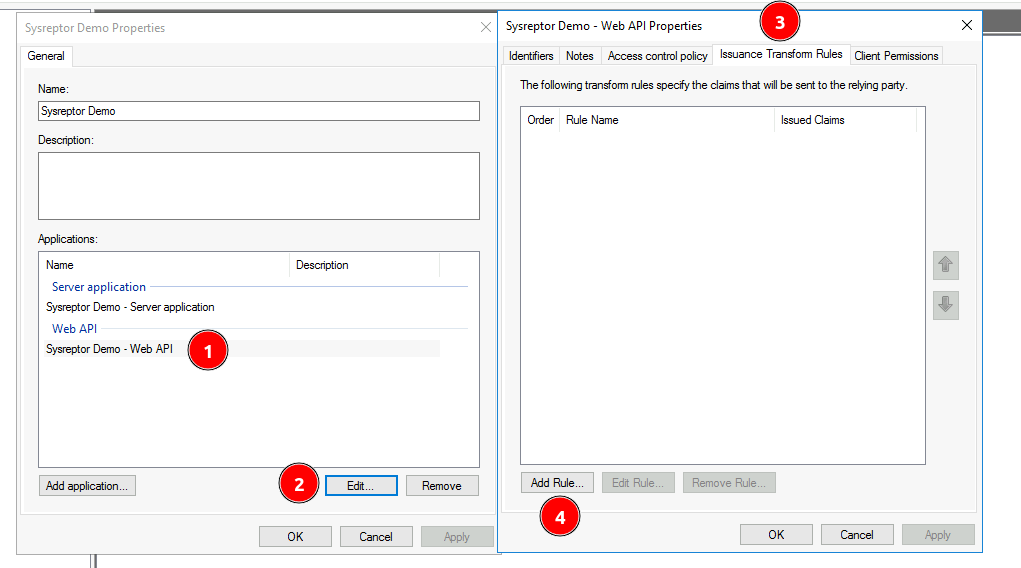
Properties - Then Select the "Web API" (1) and click "Edit" (2)
- In the new window, select the "Issuance Transform Rules" tab (3) and click "Add Rule" (4)
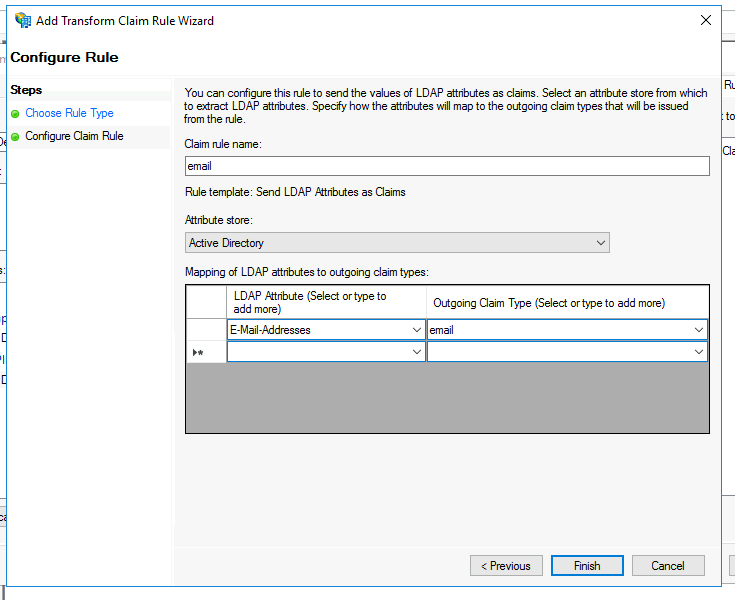
- Select the rule template "Send LDAP Attributes as Claims"
- Finally, add a rule named "email" which maps the "E-Mail-Addresses" LDAP Attribute to the claim type "email".
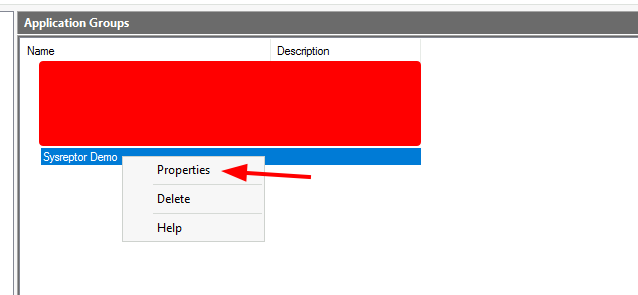
- After creating your application group successfully, right click on your application and click on
You should now have the following values:
- Client ID
- Client secret
SysReptor Configuration
Create your OIDC configuration for SysReptor...
json
{
    "adfs": {
        "label": "ADFS",
        "client_id": "<your client_id>",
        "client_secret": "<your_client_secret>",
        "server_metadata_url": "https://adfs.your.domain/adfs/.well-known/openid-configuration",
        "client_kwargs": {
            "scope": "openid profile email",
            "code_challenge_method": "S256"
        },
        "reauth_supported": false,
        "user_identifier_claim": "email",
        "require_email_verified": false
    }
}...and add it to your application settings (OIDC_AUTHLIB_OAUTH_CLIENTS).
The OIDC client needs to be able to establish a network connection to Microsoft ADFS. Make sure to not block outgoing traffic.
Other JSON fields, user_identifier_claim, and general SSO limitations are covered in Generic OIDC configuration and Limitations.